
Picture this (pun definitely intended). You’re given a floor tile and you’re asked to use it in a 3D render. Incredibly simple and easy to execute. Download the image, put it in your model and voila! All good to go. It’s supposed to be 5 minutes of work, and yet it took me a week of research, programming, pulling my hair out and four levels of imposter syndrome to finish it. Here’s why.
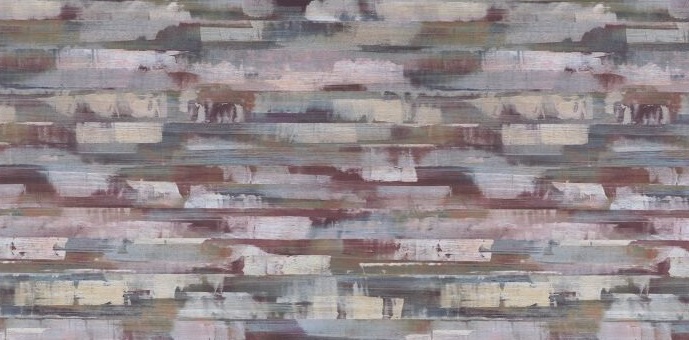
Imagine this is the tile you’re dealing with. Looks real simple right?
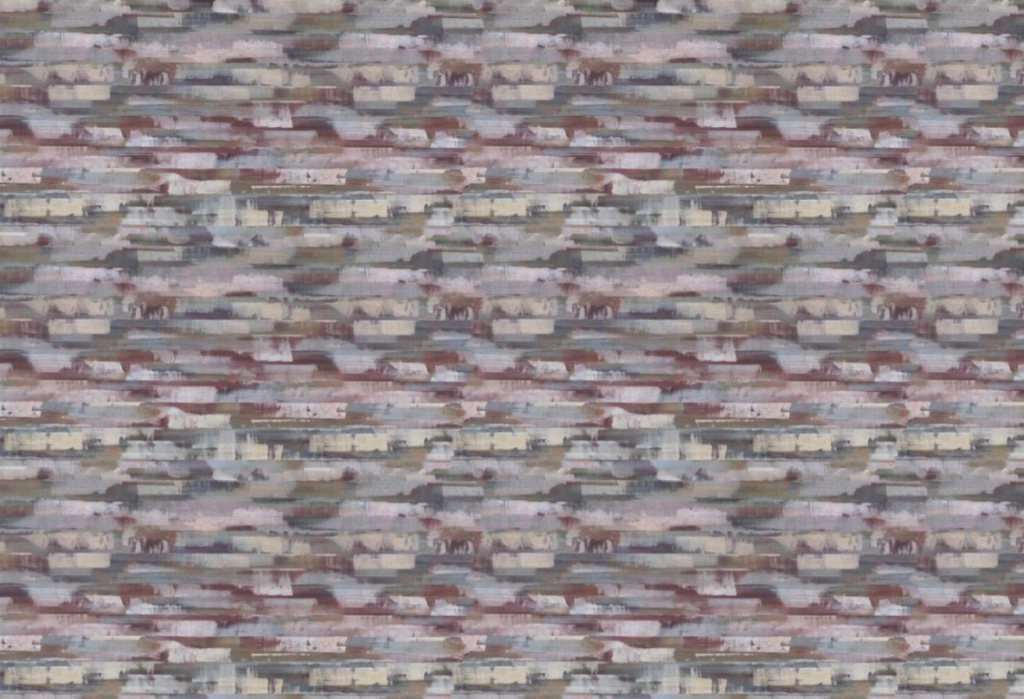
Here’s what it looks like when you put together multiple of these images.

Those seams in between images where they meet are an absolute menace in a 3D render. Architects and designers would spend endless time loading up those images in Photoshop and blurring over those lines or trying to blend them in so that the seam wouldn’t be visible. Spoiler alert: super tedious and a headache to deal with.
Now, what if there was a way to automagically get rid of those lines? That would solve a MAJOR problem and save this industry so many man hours. This is where I come in. This is where my story of stumbling through the rabbit hole begins.
Off the top of my head, my first approach was very crude. Take two images along the width, have them overlap by a pixel count as a percentage of their dimensions, and Gaussian blur that up. So easy pfft, why were all these people struggling to do this?

I spend 15 minutes coding it in Python and check out the result.
It was absolutely horrific. I have no idea why I thought this was a good idea AT ALL. I was stumped, caught off guard. But hey, not the end of the world, I’m sure there’s a good way to do it. And where do you go when you’re looking to copy some code that does the job you’re supposed to?
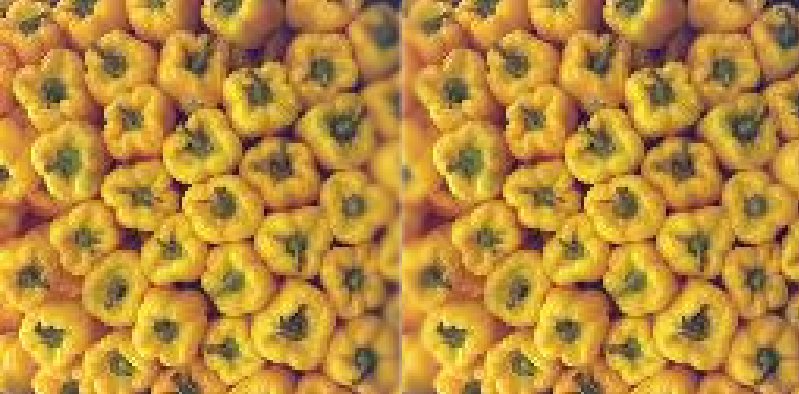
This is the StackOverflow thread I got to after an hour of sifting through the internet. It’s a rather interesting technique, where instead of blurring the overlapping region, you just define two ramp masks for both images and use those to get a ‘gradient’ image for the overlapping part. I had some faith in this idea, especially since the images used in the post were rather promising. So I did a quick little ‘hippity hoppity your code is now my property’, edited it to fit the general use case of my application and voila! PyTiler v2(yes that’s the name I gave this project) was ready to go for a test drive!

The results improved, but I was not at all close to the final product. This technique worked for a few cases, but in most of them, the seams were still evident. I spent another hour or two looking for a way or a technique to solve this problem. No luck. Proceeded to call it in, and figured I’d pick this up the next day.
I started afresh on looking for new techniques when I stumbled upon a paper by Efros and Freeman from University of California, Berkeley titled “Image Quilting for Texture Synthesis and Transfer”. This paper was a new beacon of hope for me. Their results were phenomenal, they seemingly created a larger sample of an image using parts of the smaller image in simplistic but computationally expensive methods.

This was PERFECT. I immediately began looking for an implementation of this online and I did come across repositories that performed this well. So now I have working code that solves my problem. Hey, I did it! I don’t have to deal with imposter syndro-
It takes 40 hours to render one image. Efros and Freeman’s algorithm while impressive works well for smaller images. The images I was operating on were almost 30-50 times larger than these samples. Along with this, the required scale of the output images was also many magnitudes higher. All this with the added caveat of having this be a live application, so loading time could not exceed 2-3 seconds. I spent 2 days trying my best to optimize this in any way I could, but the lowest I could bring it down to was 2 hours, and the results there were barely satisfactory anyway.
Back to the drawing board. Out of ideas, out of inspiration. Dunning Kruger overlooking me in the abyss of their silly little curve. I felt like a headless chicken with no direction to run into.
I decided to pick up the paper again and break it down step by step to get my own way of doing it. And that’s where I got the backbone of my program: the minimum boundary error cut technique.

Efros and Freeman were picking up blocks or “subimages” from the base image and pasting them to enlarge the image. But instead of random placement or overlapping regions like my earlier implementations, they went with this interesting approach of a minimum error boundary cut. Rather intriguing, but it’s only described as a 4 line paragraph in their paper.
I have never paid as much attention to 4 puny lines of words in my life ever before. I broke it down to its absolute last atom to completely absorb that information and replicate it from scratch. The original algorithm estimated a very ‘random’ image and so the blocks of consideration were very small and there were a lot of variations to consider. However, my use case was to resemble tiling, and so I could get away with just using the minimum error cut technique. Right?
RIGHT. Here’s a good turn for once in this article. I expanded upon this technique and built my own implementation in Python for it. I had never used dynamic programming for anything outside a coding contest before this, and this was one of my favorite problems to solve because of how straightforward and elegant the final solution is.
The minimum boundary cut looks at an overlapping region of pixels of height h and width w. In the first row, it assigns every pixel a score, which is essentially just the sum squared error of the RGB values of both images at that point. After that, we iterate over all pixels in subsequent rows and the score of each pixel in these rows is the sum squared error of RGB values, added to the minimum of the scores of the pixel above it, the pixel one up and left, and the pixel one up and right. Formally,
s[i][j] = The sum squared error of RGB values of both images at (i,j) = (A[i][j][0] – B[i][j][0])**2 + (A[i][j][1] – B[i][j][1])**2 + (A[i][j][2] – B[i][j][2])**2
and
dp[i][j] = The minimized sum of errors of all pixels in the path that ends at (i,j)
dp[i][j] = s[i][j], if i == 0
dp[i][j] = s[i][j] + min(dp[i-1][j-1],dp[i-1][j],dp[i-1][j+1]), if i > 0
By adding the minimizing condition, our seam instead of being a straight line will be a jagged one that turns at certain points to minimize the color difference in the overlap region. Because I could not find a simple implementation of it and because I was dealing with n concatenations instead of just 1, I had to work out my own math to successfully develop this model.
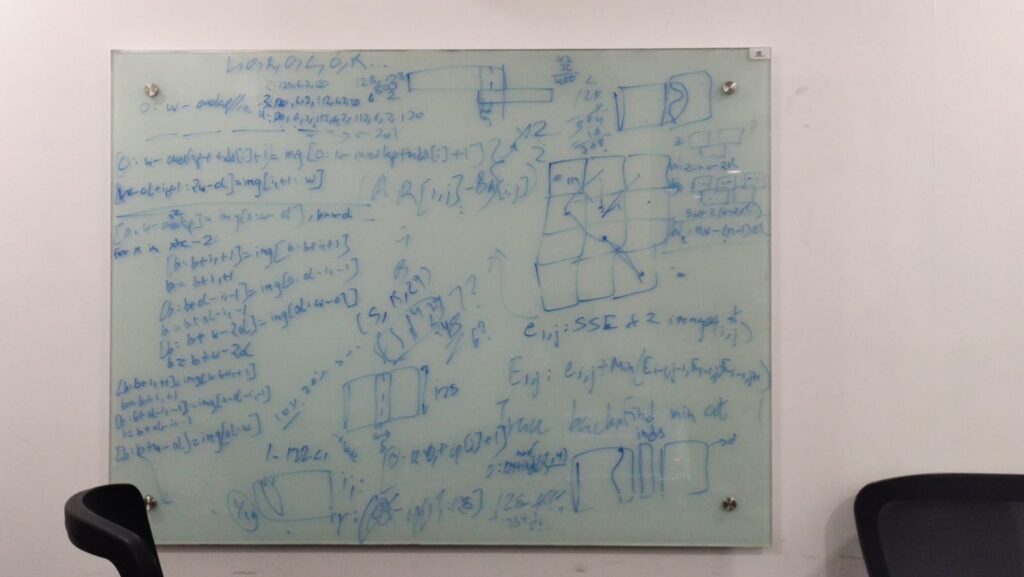
This is what the office board looked like after I had spent a couple hours understanding and deriving my own formulae. Yes, I love math. No, I was not trying to have a John Nash moment.
Since I had spent a lot of time (and I mean A LOT OF TIME) in making sure my math was spot on and my pseudocode was correct, programming this application did not take me long. I wrapped all this in a little Flask server, and the test results were miles ahead of any of my earlier programs.
Remember the image in the beginning with the seams?
Everyone at the office I showed it to was impressed by it, wondering how I managed to do this. To be honest, I don’t blame them. Some of the results of this technique were so astonishingly unexplainable that it did feel like magic. But hey, as Peter Parker told Doctor Strange,

Since then, I’ve made a few improvements to the model. I’ve moved to a minimum unit tile approach, allowing the generation of not just an image without seams, but a seamless texture from an image that can be tiled indefinitely without you ever having to put up with the little lines ruining your work.
Can this algorithm be improved? Absolutely. One of the biggest issues with this is that the user has to enter the amount of overlap region to be utilized, and every image has a ‘sweet spot’ for what threshold value works best. Maybe in the future I can look into comparing samples by assigning them a score based on seam visibility, but for now, this gets the job done.
Solving problems like these is my favorite part of being a programmer. Making a website or doing things you know is alright, but it’s not enough. Being stuck in a pickle, having to learn topics you never thought you’d need to, gives me a certain rush that I can’t quite replicate elsewhere. I love programming.
Until the next problem!